How to Configure Websphere in RAD
- Open RAD from Start à All Programs
- Click Ok to following screen. [ We can create multiple workspace ]
4. Suppose you want to create a new Work space do the following as per screen.
5. Click Other and you will come to following screen
6. Provide the new Dir structure and click Ok. That Dir will be your new Workspace .
7. Suppose you have multiple work space. To go to a particular workspace you need to follow the same process as specified above. Instead of creating anew just you need to select the workspace that you want to open.
8. To configure the Websphere in RAD you need to do the following steps.
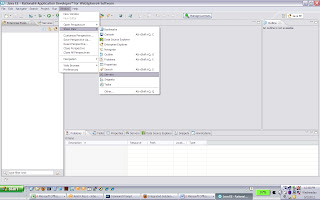
9. See the Screen.
10. Click on servers as shown in above figure
11. After that at the bottom you will get server space. Right click on that click
New -->Server.
12. First Select your Websphere version. Here in our case it is Was 7.0 then Click Add at the bottom. You will et another pop up. Click on Browse and select the location where Websphere is installed. Then click on Finish
13. Now click on Next
14. Select the right profile, Provide the user Id and Password and click Test connection.
15. If every thing is fine you will get a success message like below.
16. Click Ok and then Next
17. If you have already added project then that will be available in the left side of the space. Other wise simply click on finish button
18. After that you will be returned to main screen. Configuration of websphere is done.
19. To verify click on server at the bottom and you will be able to see the status of Websphere server.
20. What ever you want to do with that server like Start, Stop, Add project, Remove Project, open in Debug mode etc. You can do that by right click on server.
21. To create a project. Following steps needs to follow
22. To create a dynamic project you can do as follows
23. You will come to following screen. Provide the Project name and click Next
24. Next you will come to following screen. Click Finish
25. Click Yes for following screen
26. Now you need to create a package as follows
27. Give the package name and click finish
28. You will come to following screen. You can see Test1.edu has been created
29. Now create a new Servlet under that newly created package
30. You will come to next screen. You need to give the servlet name/class name here and click on Next
31. You will come to following screen. Click Next
32. Select the methods you want for your servlet [ doget, dopost etc ] and click Finish.
33. It will create a Servlet for you.
34. I have just added some code to display a message. Change the code and save that.
35. Now to reflect these changes you need to publish. For that go to server and click on Publish icon available at the bottom right side.
36. Before publishing you need to add that project. To do so right click and click Add and remove project
37. So from the left side you select and click Add and click Finish
38. At the bottom you can see the status of publish progress
39. After this. Suppose you want to Run the servlet. For that Right click on Code and do as per screen.
40. Select the Server and click Next
41. Select the package and click finish
42. You will get the output as below
Great You are Done.
Amit Kumar Roy


No comments:
Post a Comment