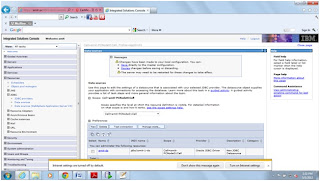
1.
Login to Admin
console. Provide user id and password.
2.
Go to Resources --> JDBC --> JDBC providers . you will get following screen.
3.
Select Scope and
then click on New.
4.
Select the provider
as shown in figure and click Next.
5.
Provide the
location of ojdbc6.jar and click Next.
6.
You will come to
following screen. Click Finish.
7.
Now you will come
to following screen. Click on Save.
8.
Now you will come
to following screen. You will be able to see the added JDBC provider. Select
that and click on that.
9.
Now you will come
to following page. Provide the directory location of ojdbc14.jar and click on
Apply.
10.
You will come to
following screen. Click on Save.
Now Creating the
DataSource
1.
Go to Resource -->
JDBC --> Data Source. You will come to following screen.
2.
Select Scope and
click on New.
3.
You will come to
following page.
4.
Provide the Data
source name and JNDI name. Data source will be used as administrative purpose
and JNDI name will be used to access the data source. Now click Nexts
5.
You will come to
following screen. Select the existing provider and click on Next
6.
You will come to
following screen. Provide the following info.
jdbc:oracle:thin:@host_name:port:service
i.e
jdbc:oracle:thin:@localhost:1521:oracle
How to find host_name, port and service. Go
to C:\app\amit\product\11.2.0\dbhome_1\NETWORK\ADMIN
Check tnsname.ora file.
7.
Click Next on the
above screen. You will come to following screen. Simply click on Next.
8.
Now you will come
to Summary Screen. Verify the details and click on Finish.
9.
Now you will come
to following screen. Click on Save button.
10.
Now you will come to following screen. Select
the newly created data source and click on Test connection.
11.
If
You are getting User Id & Password Invalid Error?
The test connection
operation failed for data source MyDB (Non-XA) on
server nodeagent at node
MY_node with the following exception:
java.sql.SQLException:
ORA-01017: invalid username/password;
logon denied DSRA0010E:
SQL State = 72000, Error Code = 1,017.
View JVM logs for
further details.
Go
to Data Source and do the Security Setting as follows.


No comments:
Post a Comment